Create and Manage Job / Promotion Applications
Create and Fill a Job/Promotion Application (Internal)
- From the left sidebar, navigate to your Dashboard.

- Under the Recruitment & Promotion category, select Job Application.
- To create a new application, click New job application.

- The application form will appear. Fill in all the required fields:
Note: If you click Cancel at any step, the application process will be terminated, and no data will be saved.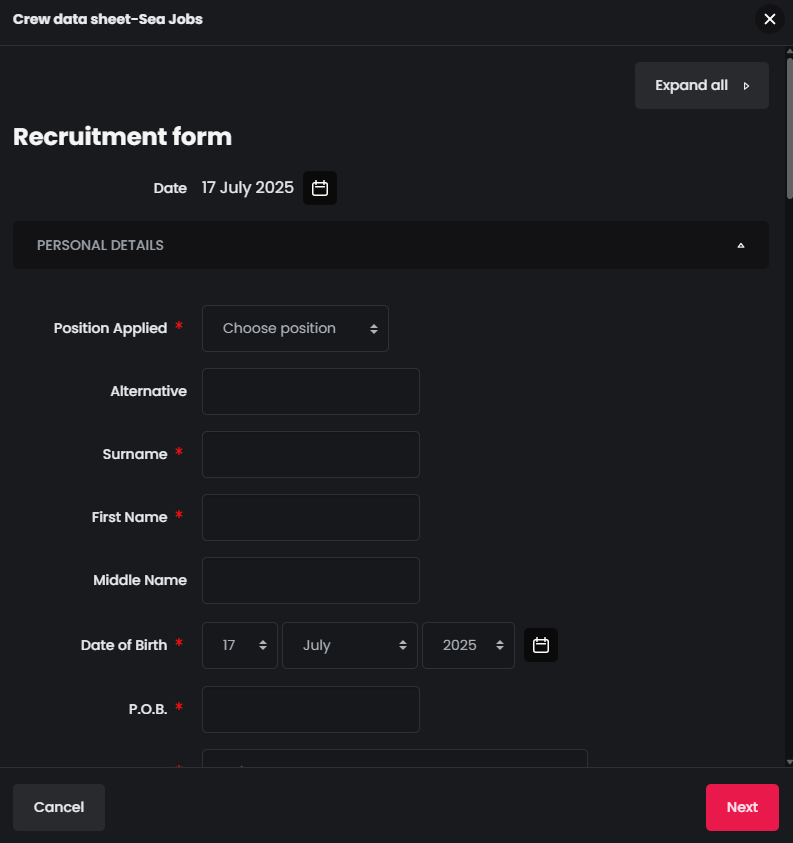
- Personal Details:
- Date – Automatically filled with the application’s creation date. (This field cannot be edited.)
- Position Applied – Mandatory. Select the position you are applying for.
- Alternative – Optional. Enter a different position if applicable.
- Surname and First Name – Mandatory
- Middle Name – Optional
- Date of Birth – Mandatory
- Place of Birth (P.O.B.) – Mandatory. Enter the city or town where you were born.
- Country – Mandatory. Select your country of nationality or residence.
- Sex – Mandatory. Choose from:
- Male
- Female
- Other
- Civil Status – Mandatory. Choose from:
- Single
- Married
- Divorced
- Widowed
- Children – Mandatory. Indicate whether or not you have children.
- Upload your Photo:
- Upload a clear and visible photo of yourself.
- You can drag and drop the file into the designated area or click Choose File to upload from your device.
- The photo must be in one of the accepted formats (as listed under the upload area) and must not exceed 10MB.
- Address:
- Complete the following mandatory fields:
- Street Address
- City
- Country
- Airport
- Phone Number
- Optional fields:
- Landline Number
- Fax
- Next of Kin:
- Provide details about your next of kin, which includes your closest living blood relative, spouse, or adopted family members. This section can be completed later using the Edit option.
- National Identity Documents / VISA. Enter your information for the following as applicable:
- Passport
- Seaman’s Book (SB-Book)
- US-VISA
- Other Visas
- Languages:
- Select your Level of English.
- Enter your Mother Language.
- Add any Other Languages you speak. You may add more than one in the Other Languages field.
- Medical Examination Certificate:
- Indicate whether you possess a Health Certificate.
- Enter the Issue Date and Expiry Date, if applicable.
- Vaccinations (Valid for Duration of Contract):
- Indicate whether you are vaccinated for each listed illness.
- For Hepatitis B, if you select Yes, you will also need to specify how many shots you have received.
- Complete the following mandatory fields:
- Click Next to continue.
- Experience Section:
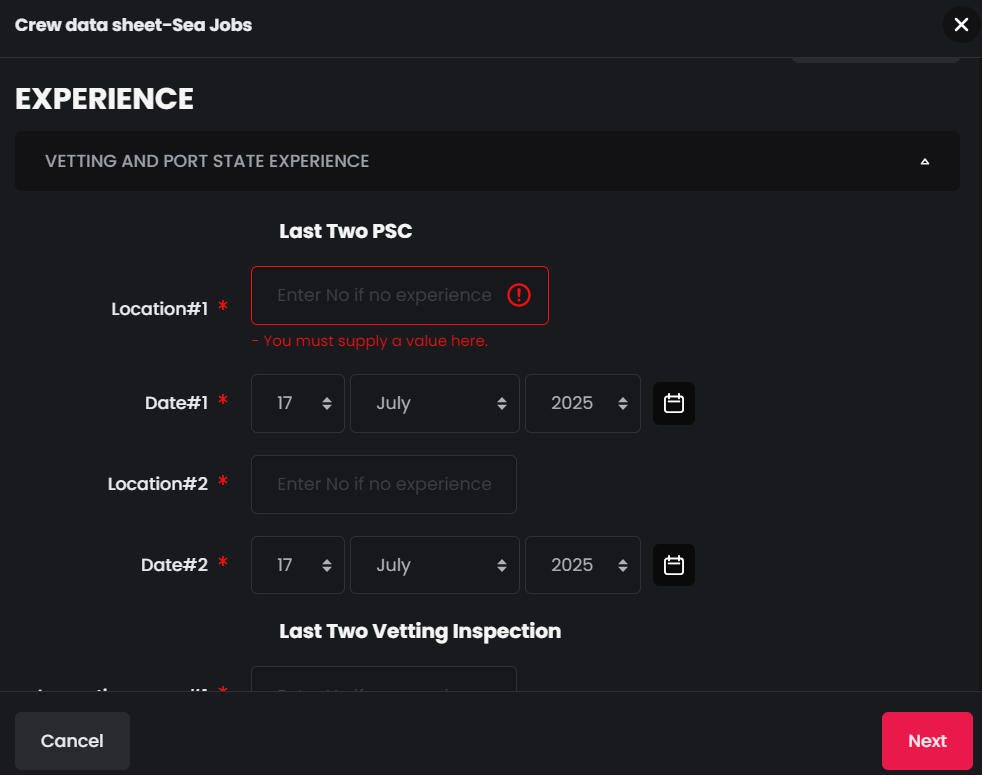
Vetting and Port State Experience:- Last Two PSC (Port State Control) Inspections:
You must provide information for two Port State Control experiences (or indicate no experience):- Location #1 – Enter the inspection location, or type No if none.
- Date #1 – Enter the inspection date, or leave it as today’s date if you selected No in Location.
- Location #2 – Same as above.
- Date #2 – Same as above.
- Last Two Vetting Inspections:
You must provide information for two vetting inspections (or indicate no experience):- Inspection Name #1 – Enter the inspection name, or type No if none.
- Location #1 – Enter the location, or type No if none.
- Date #1 – Enter the inspection date, or leave as today’s date if you selected No in both previous fields.
- Inspection Name #2 – Same as above.
- Location #2 – Same as above.
- Date #2 – Same as above.
- Last External Class Audit:
- Location – Enter the audit location, or type No if no experience.
- Date – Enter the audit date, or leave as today’s date if No was selected.
- Last External Class Survey:
- Location – Enter the survey location, or type No if no experience.
- Date – Enter the survey date, or leave as today’s date if No was selected.
- Last Two PSC (Port State Control) Inspections:
- Training Courses:
- For each of the following courses, select Yes or No:
- Bridge Resource Management.
- Ship Handling.
- ECDIS.
- Cargo and Ballast Handling.
- Safety Officer.
- Risk Assessment.
- Incident Investigation Training.
- Crane Handling Simulator.
- Hatch Cover Maintenance.
- Heavy Lift Course.
- Securing of General and Heavy Lift Cargoes for Officers.
- Crane Troubleshooting.
- Engine Resource Management.
- Main Engine Training.
- You may also click the + icon to add additional training (specify Training Name, Issue Date, and Issued by) or click the – icon to remove a training entry.
- For each of the following courses, select Yes or No:
- Graduated From:
- Enter your Academy or University Name and your Year of Graduation.
- Form of Education:
- Indicate whether you had Formal Education. Select Yes or No.
- Working Clothes:
- Fill in the following (can be updated late via the Edit option):
- Overall Size.
- Safety Shoes Size.
- Height.
- Fill in the following (can be updated late via the Edit option):
- Years in All Ranks:
- Enter the total number of years of experience across all ranks.
- Sea Service by Vessel Type:
- Select Yes or No for each type of vessel you’ve worked on:
- Oil Tankers.
- LPG Tankers.
- Oil/Chemical Tankers.
- Bulk Carriers.
- Container Vessels.
- Other Types of Vessels.
- Select Yes or No for each type of vessel you’ve worked on:
- Sea Service by Engine Type (Engine Officers only):
- Enter Years of Experience with each Main Engine Type.
- Enter Years of Experience with each Auxiliary Engine Type.
- Complete Sea Service (Optional):
- For each vessel you’ve served on, fill in the following details:
- Vessel Name.
- Flag.
- Year Built.
- Type.
- GRT.
- Engine.
- KW.
- Company.
- Crew Agent.
- Rank.
- Sign-On (S/On) Date.
- Sign-Off (S/Off) Date.
- Duration (Months/Days).
- Use the + icon to add another vessel and repeat the process.
- Click Next to continue.
- Qualification STCW:
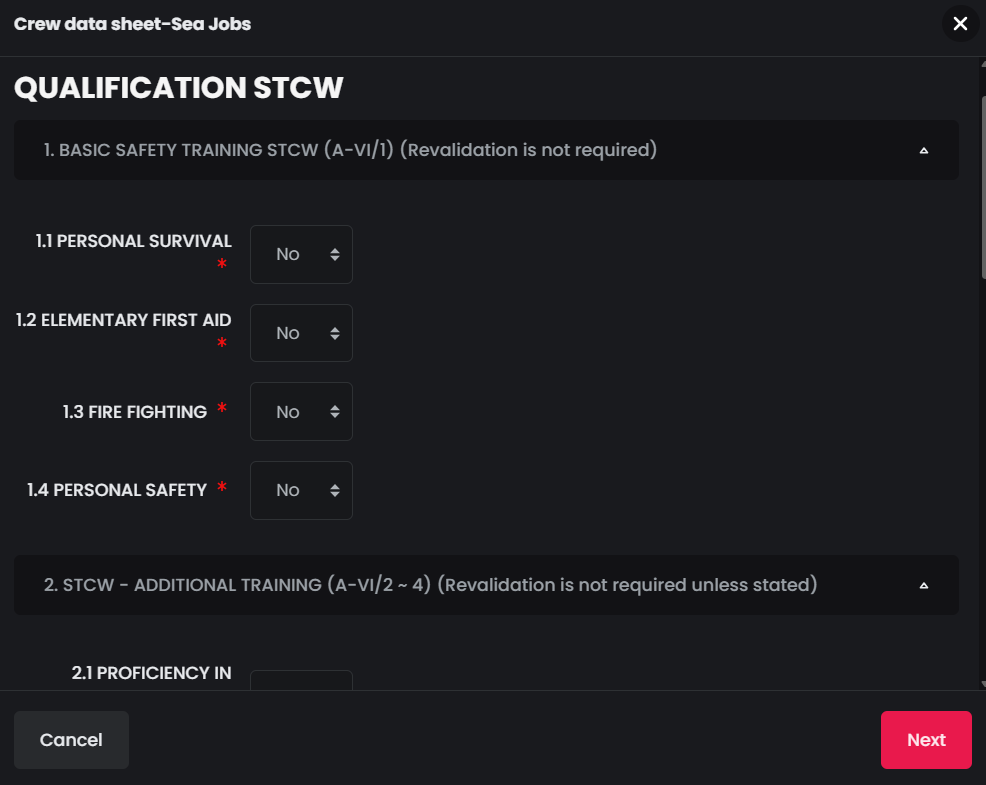
- Basic Safety Training STCW (A-V/1) (Revalidation is not required):
- In this tab, select Yes or No for each of the following mandatory courses:
- Personal Survival Techniques.
- Elementary First Aid.
- Fire Prevention and Fire Fighting.
- Personal Safety and Social Responsibilities.
- In this tab, select Yes or No for each of the following mandatory courses:
- STCW – Additional Training (A-VI/2 ~ A-VI/4) (Revalidation not required unless otherwise stated):
- All fields in this tab are optional. Select Yes or No for any of the following qualifications:
- Proficiency in Survival Craft and Rescue Boats (other than Fast Rescue Boats).
- Ship Security Officer.
- Security Awareness Training.
- Advanced Fire Fighting.
- Medical First Aid.
- Medical Care.
- Safety Officer.
- ECDIS (Generic).
- Designated Security Duties.
- HAZMAT (Hazardous Materials Training).
- All fields in this tab are optional. Select Yes or No for any of the following qualifications:
- Certificate of Competency (A II/1-4, A III/1-4) – Officers & Watchkeeping Ratings:
- This tab is optional and includes:
- Capacity – Enter your certificate capacity or role.
- GMDSS – Select Yes or No to indicate if you hold a valid GMDSS certificate.
- This tab is optional and includes:
- Other Certificates:
- This tab is optional. Select Yes or No for the following specialized certificates:
- Ballast Water Treatment System (BWTS).
- Exhaust Gas Cleaning System (EGCS).
- High Voltage (HV) Systems.
- IMO Model Course 1.22 – Ship Simulator and Bridge Teamwork.
- This tab is optional. Select Yes or No for the following specialized certificates:
- Special Requirements – Tanker Certification (A-V/1):
- This tab is optional. Indicate Yes or No for each of the following tanker-related qualifications:
- Basic Oil & Chemical Tanker Cargo Operations.
- Advanced Oil Tanker Cargo Operations.
- Advanced Chemical Tanker Cargo Operations.
- Basic Liquefied Gas Tanker Cargo Operations.
- Advanced Liquefied Gas Tanker Cargo Operations.
- Basic IGF Code Training (Gas-Fueled Ships).
- Advanced IGF Code Training.
- This tab is optional. Indicate Yes or No for each of the following tanker-related qualifications:
- Ice-Class & Polar Waters Training:
- This tab is optional. Select Yes or No for:
- Ice Navigation (Ice-Class Vessels).
- Basic Training for Ships Operating in Polar Waters.
- Advanced Training for Ships Operating in Polar Waters.
- Cold and Heavy Weather Navigation.
- This tab is optional. Select Yes or No for:
- Additional Qualifications:
- This tab is optional:
- Use the Any Other Additional Qualifications field to list any extra certifications not covered above.
- At the end of this section, confirm your input by selecting I declare that the above information is true and correct. Choose Yes or No.
- This tab is optional:
- Click Next to Submit the Form.
- You will be redirected to Job Applications Management page:
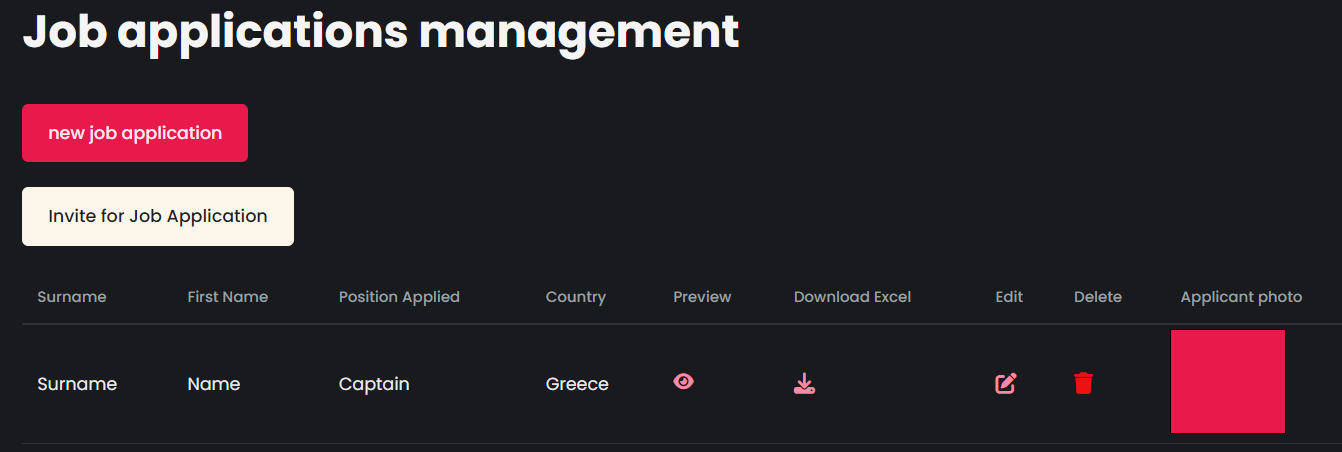
- On this page, you can view, create, invite, edit, delete, or export job applications:
- Preview – Click the Preview button to review the application before submitting.
- Download Excel – Use this button to export the application in Excel format for external use or recordkeeping.
- Edit – Allows you to:
- Fill in missing information.
- Correct existing details.
- After making changes, click Save Changes to apply your updates.
- Delete – Permanently remove the application from the system. Deleted applications cannot be recovered.
Invite an External User to fill a Job Application
- From the left sidebar, navigate to your Dashboard.
- Under the Recruitment & Promotion category, select Job Application.
- Click Invite for Job Application.
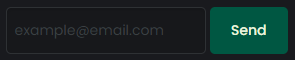
- Enter the email address of the person you wish to invite and click Send.
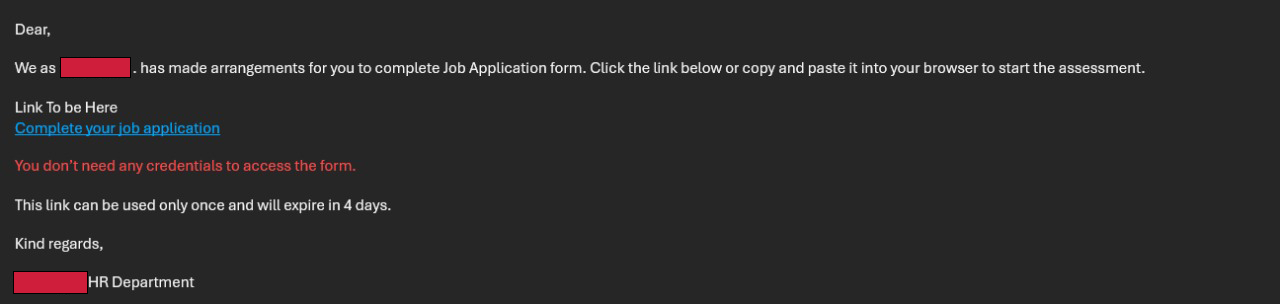
- The invited person will receive an email with a link labeled Complete your job application.
- Upon clicking the link, they’ll be redirected to a page where they can fill out and submit their application form.
- The invitation link is single-use and expires after 4 days.
- The invited user does not need an account on the platform to access the form.
- Remind them to check their Spam or Junk folder if they do not see the email in their inbox.
- Once the external user submits their application, you can find it in the Job Applications Management Page (Management Dashboard > Recruitment & Promotion > Job Application). On this page, you can view, create, invite, edit, delete, or export job applications:
- Preview – Click the Preview button to review the application before submitting.
- Download Excel – Use this button to export the application in Excel format for external use or recordkeeping.
- Edit – Allows you to:
- Fill in missing information.
- Correct existing details.
- After making changes, click Save Changes to apply your updates.
- Delete – Permanently remove the application from the system. Deleted applications cannot be recovered.