Calendar Events
Create and organize calendar events
- Navigate to your homepage (dashboard).
- In the left navigation menu, find the Calendar block
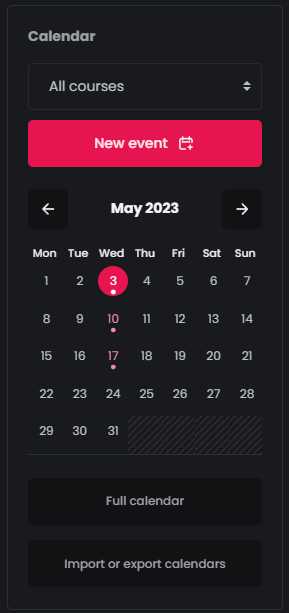
- Click on New event and you will be prompted to create a new calendar event.
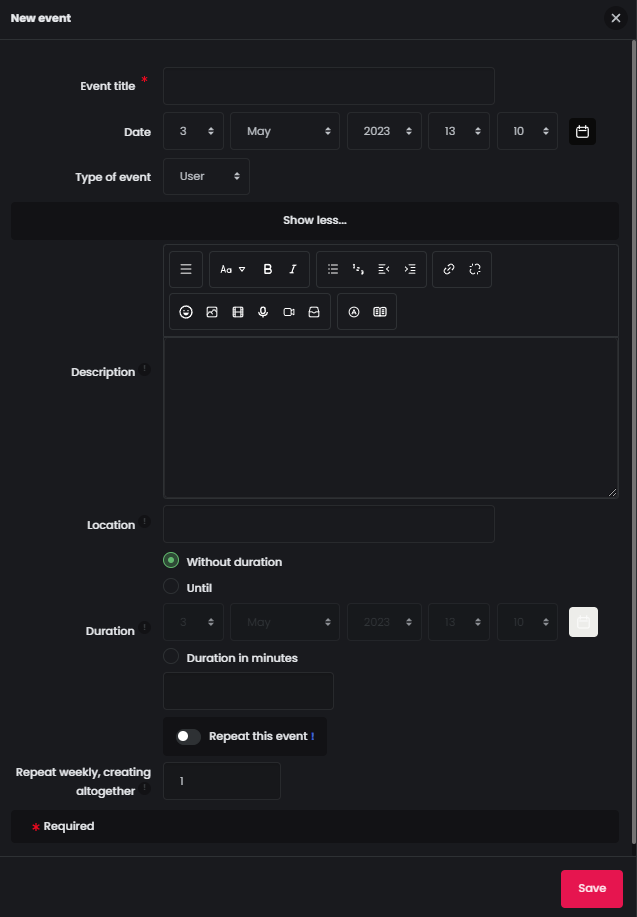
- Event title: Add the title of the event.
Date: Add the date of the event.
Type of event: You can choose between 3 options.
– User: The event will only be visible in your calendar. Other users will not have access to this information.
– Course: The event will be visible for all users in their calendars.
– Site: The event will be visible for all users in their calendars.
Click Show more to reveal more optional fields.
Description: Add a description for the event.
Location: Add a location for the event.
– Without duration: Choose this option if you don’t want to add a duration for the event.
– Until: Choose this option to choose the day/time for the end of the event.
– Duration in Minutes: If the event is to last a few minutes or hours, you can fill in the corresponding value in the text field.
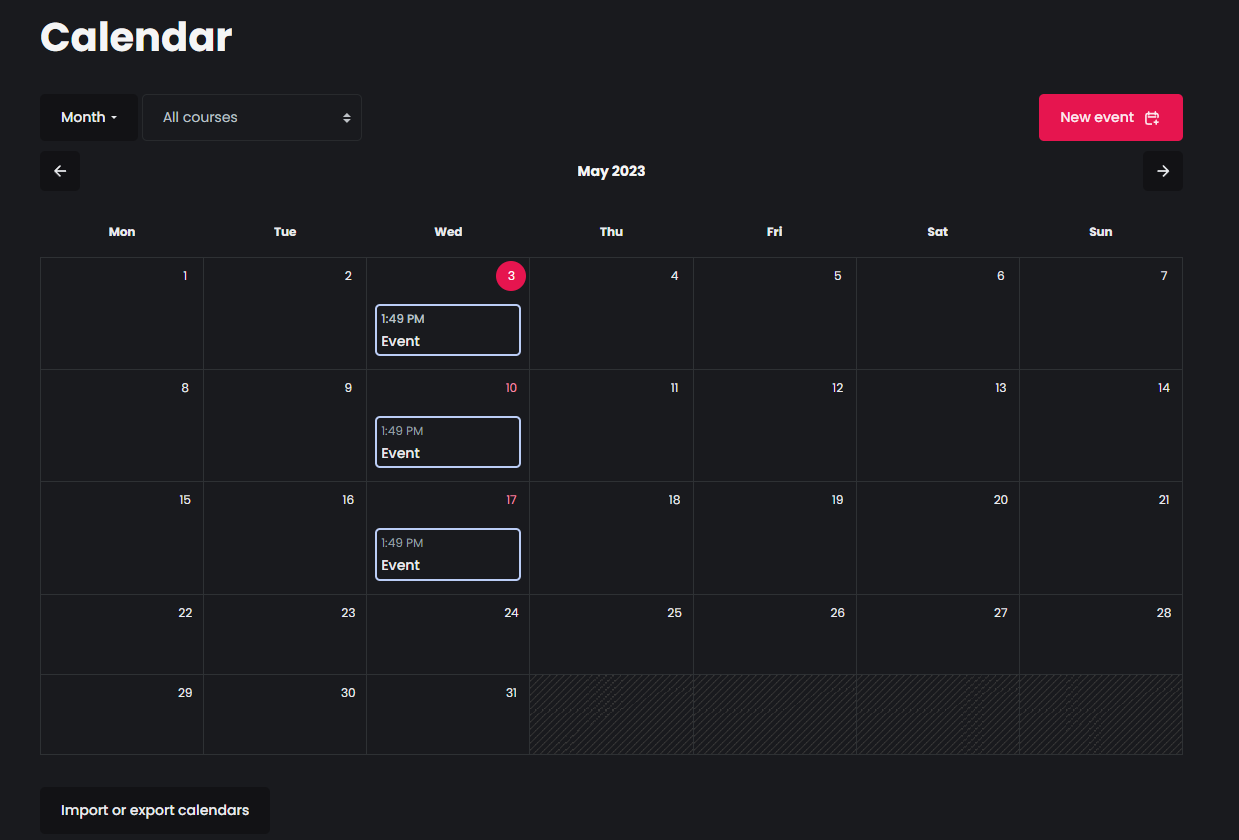
Repeat this event: If your event is to repeat on a weekly basis, then you may want to select this option. In the text field Repeat weekly, creating altogether you can put the number of events that will be created. For example if you create an event for today and in the text field you put the number 3, you will create a total of 3 events, one for today, one for 7 days from now and one for 14 days from now. - If you click on Full calendar, you will be redirected to the full calendar view, where you can see your events in greater detail.
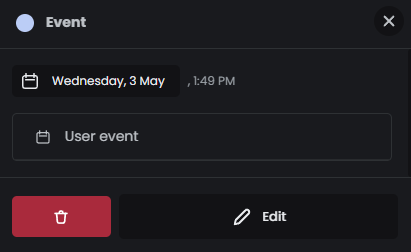
- If you want to delete an Event, navigate to the full calendar view, click on the event you want deleted, and then click on the
 icon.
icon.